Showing posts with label DIY. Show all posts

Thursday, April 5, 2012

"F" Your Style Has Moved & Will Be Updated Better Than Ever

** NEW "F" Your Style post will now be posted on http://www.fyourstyle.tumblr.com

Thank you for checking out the site. I have made a switch to be able to offer a more comprehensible experience for fashion and personal post, apart from www.GaptoothDiva.com . If you have any questions or concerns, please feel free to contact me via email GaptoothDiva (at) hotmail.com for more information.

Check out -> http://www.Fyourstyle.tumblr.com for the latest in fashion, personal style, and DIY from GaptoothDiva, THE BADDEST CREATIVE MOTIVATION!!

Wednesday, March 28, 2012

$1.00 Earrings from Blah to Cheetah Print


BEFORE: Purchased for only $1.00, hot pink and plain on both sides
I recently decided to purchase a seriously cheap pair of earrings in a bright color for the spring (well before it actually got cold again, LOL) and shortly after, I realized I didn't like them. They were a basic design and just didn't stand out to me, the way I wanted them to. So I took matters into my own hands...

AFTER: Decorated with GaptoothDiva Hand Painted Cheetah Using Permenant Marker and Nail Polish

Now... I can rock these!


Friday, March 23, 2012

A Cool Way To Organize Your Earring Collection Using An Old Picture Frame


I recently moved to a smaller space and without all the vertical room I had been used to, it became harder and harder to find places to put my makeup, accessories, and glam must-haves. I already kicked the Hubs out, so his stuff his being stored in another bedroom (sorry). However, I still find myself desperate to find space. I decided to make some wall art with my accessories, so that I'm not only filling an empty wall, but also organizing some of my earrings and creating a display.

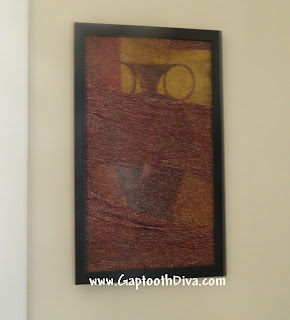
I took an old picture frame, with the picture still inside. I chose this frame because its basic and black, but the picture is cohesive with my bedroom decor. Through all the earrings, I think it would be sort of cool to see the silhouette of this African styled vase.


To add some more drama, I decided to take an old scarf that I no longer wear and wrap the photo into it. This will make it easier to hang all the earrings without putting holes in the picture. Before I could do that, I have to break apart the frame, glass, and picture from each other.


I wrapped the old scarf around the perimeter of the picture and cardboard before I placed the frame back on. I made sure the scarf was tightly wrapped, so that it didn't sag, making my earrings hang low. You can tie it into a know in the back or staple it. I chose to do both, because I don't plan to take this down for a while, so it needs to be secure. Also, take into consideration how many earrings you plan to put on there. I have quite a few, so I need to be sure this baby will stay up.


After securing the scarf, I placed the frame back on and careful ensured that no extra fabric or material was hanging off. Notice there are different layers. That's OK, it makes it easier for you to see your earrings and where they are hung, once you place them on the frame.

This is what it looks like hung up without any earrings on it. I can still see the picture behind the scarf material. Pretty cool so far.


 Step back and admire it... alrighty then, LOL.


This is what it looks like once you add your earrings to it. I chose to put the heavier ones towards the bottom, so they wouldn't get tangled. I also like to seperate my earrings by color and tone. The more I place on there the less distinct the pattern is, but you get the idea. Make sure not to overlap them too much, because you don't want to tangle the earrings or pull the scarf too much.


I enjoy looking at this everyday. I decided to put my clip-on and small earrings in the organizer to the right of the frame, so I wouldn't waste space. The more larger and artistic earrings are reserved for the frame.

If you have a organization trick for your accessories, please share in the comments, so I can check it out.

Monday, December 5, 2011

DIY - Custom T-shirt Scarf w/ Beads and Shells

#1 - Get an old t-shirt (preferably one in a color you like), some old or broken costume jewelry and a ribbon. I used an old beaded necklace with a shell pendant to make my t-shirt scarf more natural and tribal styled. No need to iron the shirt, it's not that serious. LOL

#2 - Cut the sleeves off the shirt without disturbing the bottom half. Just cut straight across the chest. I chose to keep the designs in the middle to add to the style of the scarf.

#3 - Also cut along the bottom where the seams close up on the ends.

#4 - From one side of the t-shirt begin cutting towards the other end, without going all the way. Cut thin strips (but not too thin or the t-shirt will rip after the next step) Cut straight lines if possible so that each strip is even in width. Do not cut all the way there should be less than an inch left on the other end.

#5 - The t-shirt should look like this once all the shirt has been cut into thin strips. Notice at the top there is still a small area where the t-shirt was not cut all the way. This will be your base.

 #6 - Pull each strip gently but far to stretch out the material. Once the material has been stretched, it will give a rolling effect turning each strip into a thin rope like string. Do this to each strip, being careful not to rip and strings. Gather the loops together at the base ( the portion of the t-shirt you did not cut) and it should look like this.


#7 - Add your ribbon to the base to cover up the material. You can add beaded necklaces and shells to it as well, like I did. This can be worn as a necklace with a plain t-shirt or used as a stylish and unique scarf. You can double it around your neck for a bib necklace look or let it hang low, like a chain necklace. I got many compliments about this piece, and I love it. You can use any style t-shirt. Of course the bigger the shirt, the bigger your t-shirt scarf will be. Just go nuts. Next time I will use a sweater to see if I get the same effect.


Thanks and later dolls.... "F" your Style!

Friday, November 11, 2011

DIY Fresh Individual Eyelashes

It's nothing like some fresh individual eyelashes. I think I'm addicted to these things. Without them I feel naked, so I keep doing them on a bi-weekly basis. I know, I know... This is my vice.

To complete this look I used:
Ardell's Duralash Naturals knot free 100% Human Hair Lashes in Long (Black)
Individual lash glue
Vaseline for the back of my palm
Tweezers
Foil (small square)


I use the foil to pour the glue out and I use the Vaseline (a small dime size amount) to make my hand sticky, so the lashes will stick to them. This method saves me time from pulling the lashes off the tray. I simply pull off a row of lashes at a time and I place them on my hand, so I can rotate from my hand to the piece of foil containing the glue very quickly.
This whole process takes me a little less than 30 minutes.
I refuse to pay anyone to do this for me, its so easy to learn.
However, if you just can't do this for whatever reason but really want to achieve this look, contact me. I'll do this for only $20 flat. Email me at GaptoothDiva@hotmail.com
Later dolls, I'm posting new info and videos after this weekend so stay tuned.


Thursday, November 3, 2011

The Plain Makeup Bag Turned Gaga Clutch


I saw this makeup bag insert to a leatgher purse at a thrift store in RVA almost a year ago. I knew that the bag was too cute to just be a plain makeup bag, and although it was plain on the outside, the material was strong enough and pretty enough for it to stand alone as a clutch. I always have broken necklaces and bracelets around for DIY projects, so I decided to get to work. I took a picture of the plain bags before I added anything to them to show what they looked like when I first purchesed them. Pay no attention to the ghetto fab nail designs I roacked at the time, it was a phase that I'm proud to have escaped from.

What You'll Need:

Plain clutch or makeup bag (I paid $1.00)
Glue Gun
Super Glue
Broken necklace or bracelets of your choice
Feathers (optional)
steady hands, tissue, and a fearless idea


I don't care that it's not perfect or doesn't have LV stamped all over it. It looks amazing to me. I rock this out to the club a couple of times and women complimented me on it. It's a work of art in my book. You can personalize your own clutch anyway you see fit. If you rather have a clutch full of feathers, do it. I needed something that screamed glamour and fab without it being it being in my outfit. this clutch could dress up a t-shirt and some jeans on any given day. Nothing will last around me, if it's plain #Justsaying

Monday, October 17, 2011

Throwback DIY Project - Fashionable Bracelets Re-Designed into Shoe Decor

Re-Designed by I'esha GaptoothDiva
This was one of my first creations. I had a wedding and I needed some ultra bling on my shoes. Every shoe store disappointed me, so I had to do what a Diva had to do.

I used...
  • A Glue Gun
  • Two Fashion accessory bracelets from Macy's
  • Some Super Glue
  • And a pair of shoes I bought from Burlington Coat Factory for about $25

I had to hold the bracelets in place for 10 minutes each and after a few years, they haven't come off yet.
I love these shoes! They are comfortable and some serious head-turners.

Look out for more of these because I need to update my shoe collection. Why waste 'em when you can remake 'em.


Re-Designed by I'esha GaptoothDiva

Sunday, October 16, 2011

Urban Wool Turban Made From A Winter Scarf

I think this look makes me look older and more conservative, but this is the best thing for me when I need a touch up of color and don't feel like messing with the make-up. The glasses are courtesy of Regina's in RVA and the wool turban was created using one of my winter scarves. I told you, I make things work with little to no pennies, LOL. My blazer is a clearance item from Target and a self-created beaded necklace (that is hiding near my cleavage) was added to make this casual look a little more dressy.

I wasn't in the mood for lashes or makeup but I thanked two girls at fashon show rehearsal for their lovely compliments on my look. Goes to show you can radiate beauty without all that madness. Get 'em dolls, "F" Your Style!